
Australian Aeromodellers Gallery Updated May 1, 2003
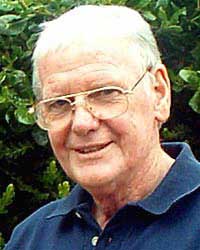 Peter McCarthy
Mentone, Victoria, Australia
Photography : Dr Russ Naughton
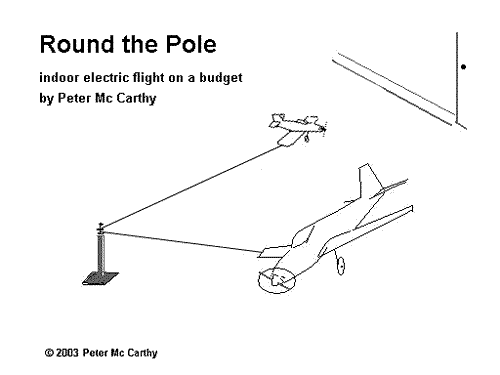
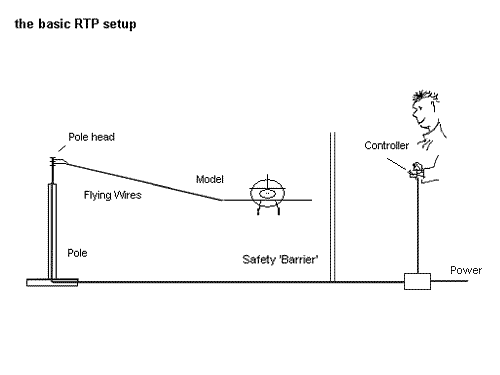
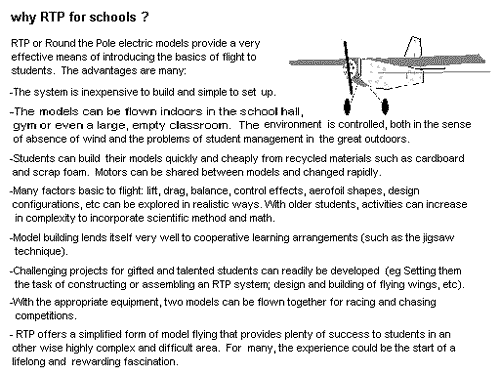
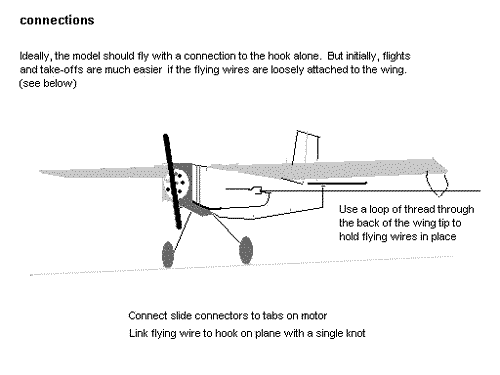
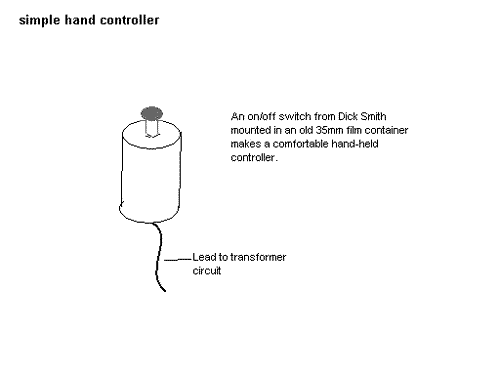
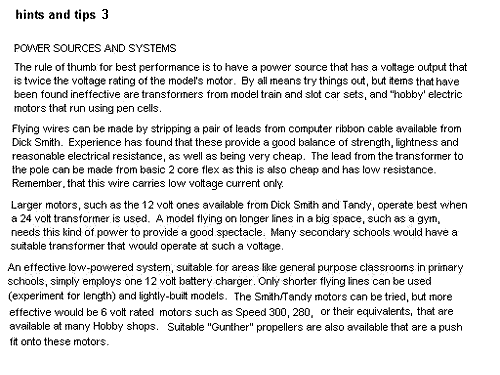
An Introduction I have had an interest in aeromodelling since childhood, but I do not share the abilities of the other enthusiasts featured on this site who are all highly skilled in building and flying elegant and complex models. My efforts have always been far more modest. But while my involvement has waxed and waned over the years, the appeal has never gone away. As a school psychologist, I have worked with children in many schools and have noted that those who develop a deep attachment to some worthwhile pastime (some call it a positive addiction), whether it be to a sport, the arts or to a hobby, are usually more competent in managing their lives at school and in the wider community. Making models that fly has a great appeal to students of all ages, but my experience with the hobby suggests that an alternative to the traditional approach of balsa sticks, tissue and glue, is needed to meet the notoriously fluctuating attention span of children. But the challenge for the teacher in moving beyond the basic paper plane stage can be formidable. Some kind of platform is required that is more likely to soften the introduction to what can be a complex hobby, thus keeping more young people "in the game". Certainly, in the long run they will be confronted with all the complexities and disappointments, but by then maybe many will be "hooked" and be prepared to hang in. The rather unorthodox approach to model flight described here is known as "Round-the-Pole" (RTP) and combines quiet electrical power with a system similar to the old 'control-liners' that used to whiz noisily around the local park. A little bit of history When slot car racing became very popular in England in the 1950's and 60's, some aero modellers were impressed by the power of the new electric motors used in the cars and looked for ways in which they might be used to operate model aircraft. This was well before the development of nickel-cadmiun, rechargeable cells and the weight and cost of using regular, expendable, zinc-carbon batteries was impractical. The problem of providing electric current to the model's motor, without the need to carry heavy batteries, was solved by the development of the RTP system which was very popular in the U.K. for many years and still has many adherents. So how does it work ? An RTP model flies in a circular path, attached by light, insulated wires to a fixed pole, mounted in the centre of a large indoor area like a school hall. Low voltage electric current is supplied from a transformer situated beside the "pilot" outside the flying circle and is conveyed to the pole through conducting flex wires running along the floor of the hall. A special rotating head mounted on top of the pole allows the current to pass through the insulated wires to the motor in the plane. The "pilot" can vary the current by means of a hand controller from a slot car set to control take-off, landing and a range of aerobatics. The system is quite safe, as long as the transformer is safe, as the voltages used are low. As with any electrical apparatus in model work like trains and slot cars, care must be taken to avoid short circuits which could lead to burning of insulation and possibly skin burns. Proper use of fuses is essential and adult supervision, a MUST. Suitable motors are usually rated for 12 volts and can be very cheap; Tandy and Dick Smith stores sell 12 volt motors currently for about $6.00. The key to making a successful system, however, lies in the output of the transformer which must be capable of supplying about twice the voltage output for which the motor is rated. That is, for a 12 volt motor, the transformer should be able to produce 20 to 24 volts and at least several amps. The reason for this is the high resistance of the lengthy wires from the transformer to the motor, especially the thin insulated wires from the pole head to the model. Motors of lower voltage rating, however, will effectivly power light models on 3 or 4 metre lines using a 12 volt battery charger for power.
A Step by Step Guide to RTP
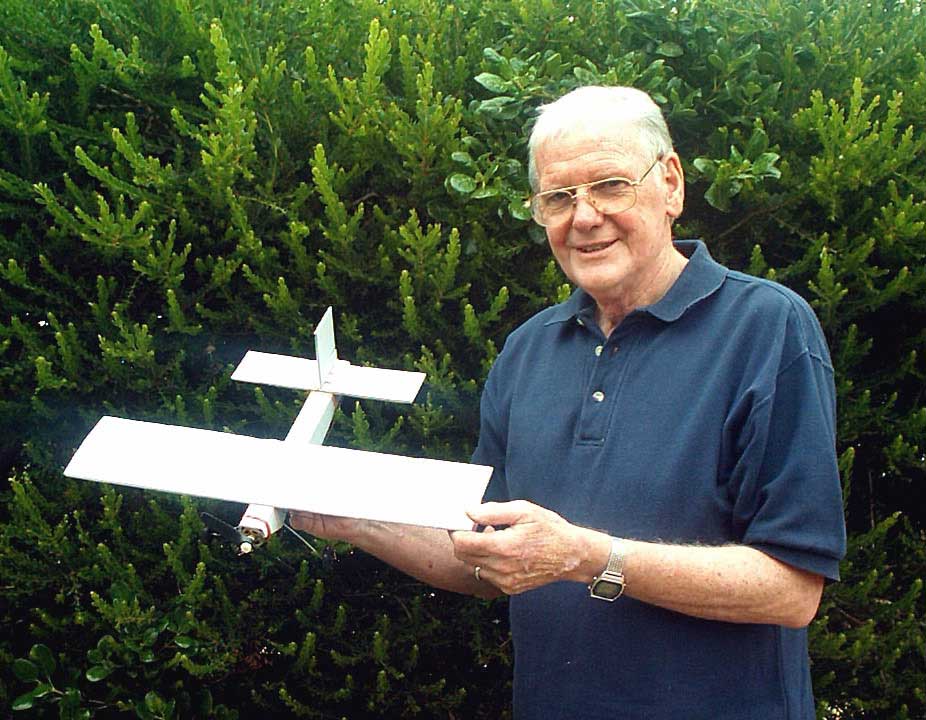 Peter McCarthy and his low cost, cardboard RTP aircraft click to enlarge
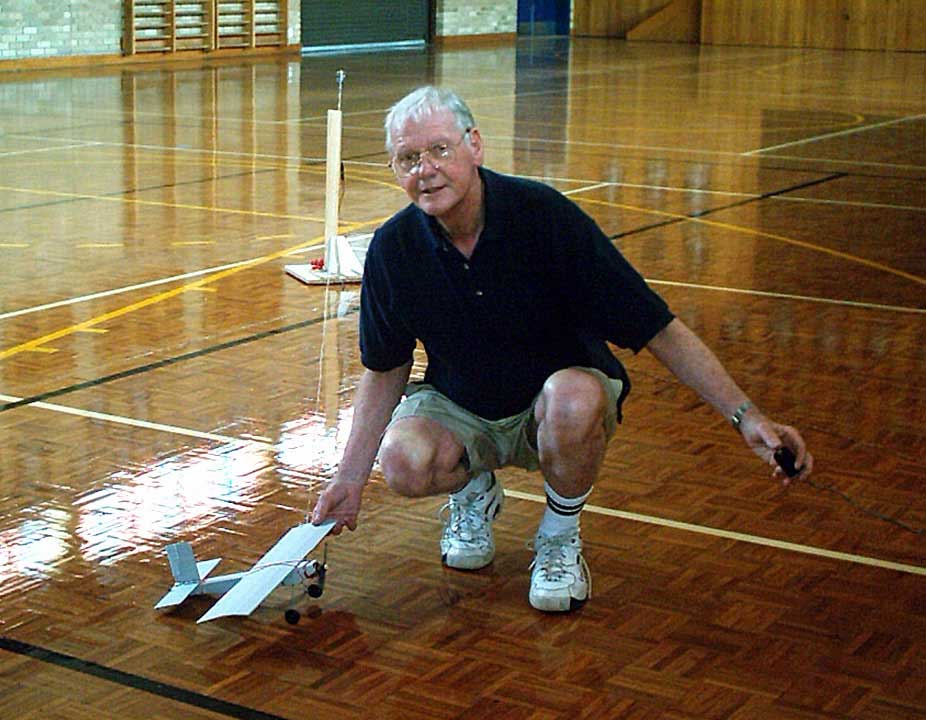
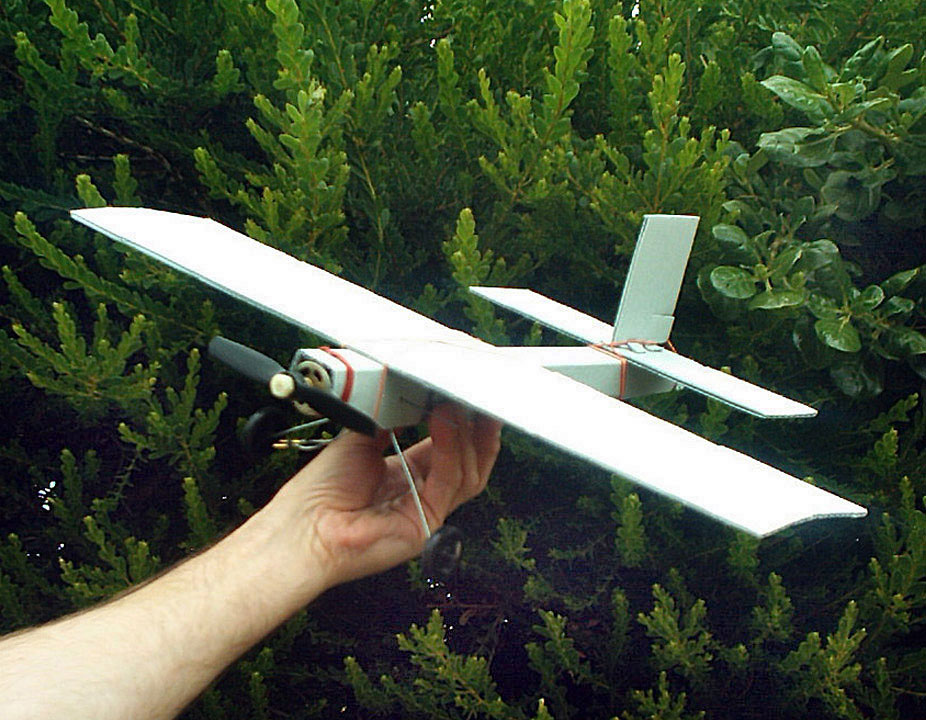
Peter McCarthy, his low cost, cardboard RTP aircraft, hand controller click to enlarge
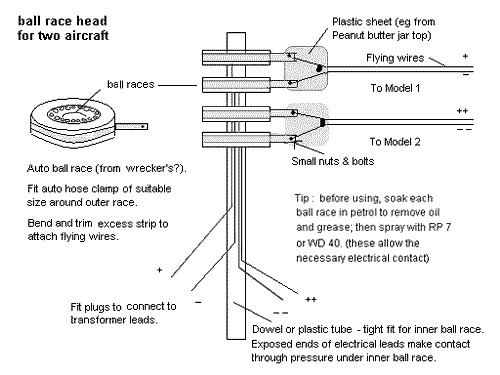
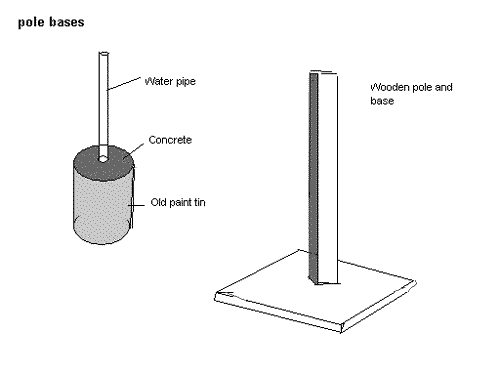
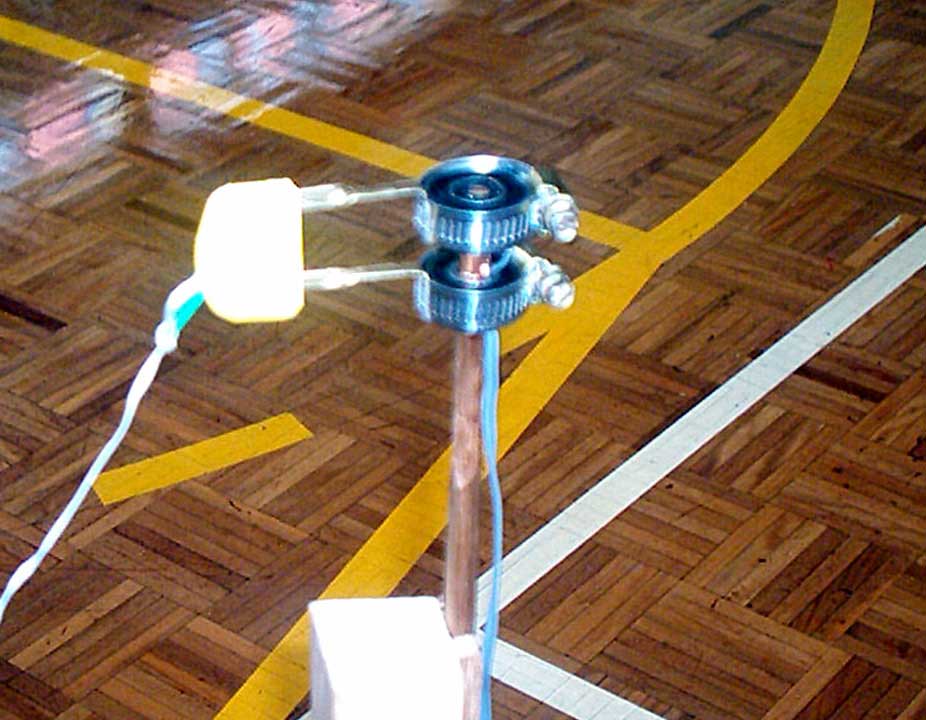 Ball Race Head (here for a single aircraft) click to enlarge

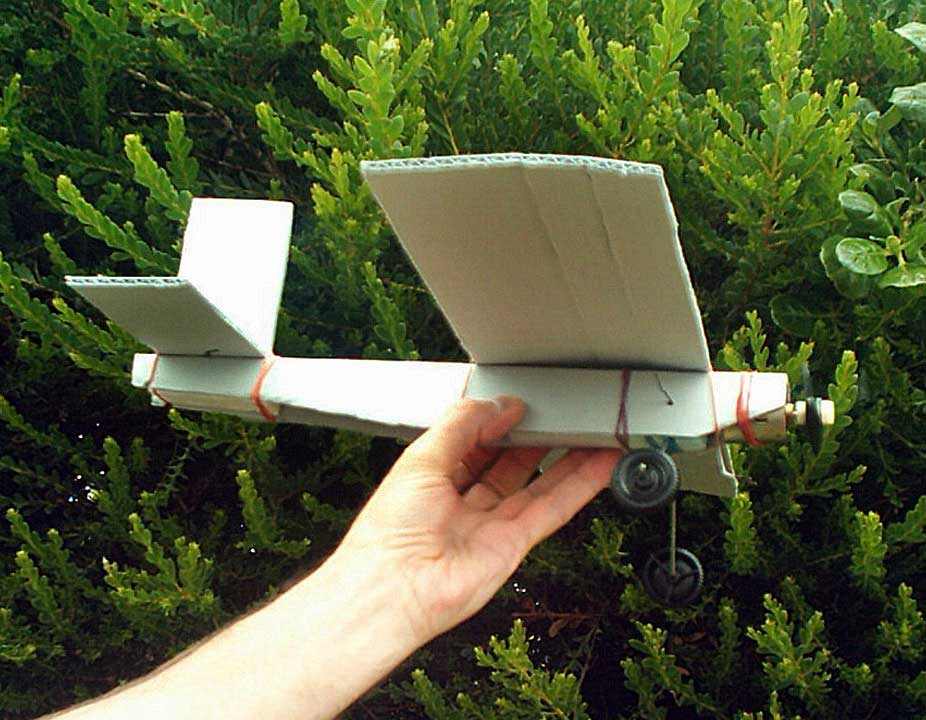 Peter McCarthy's low cost, cardboard RTP aircraft click to enlarge
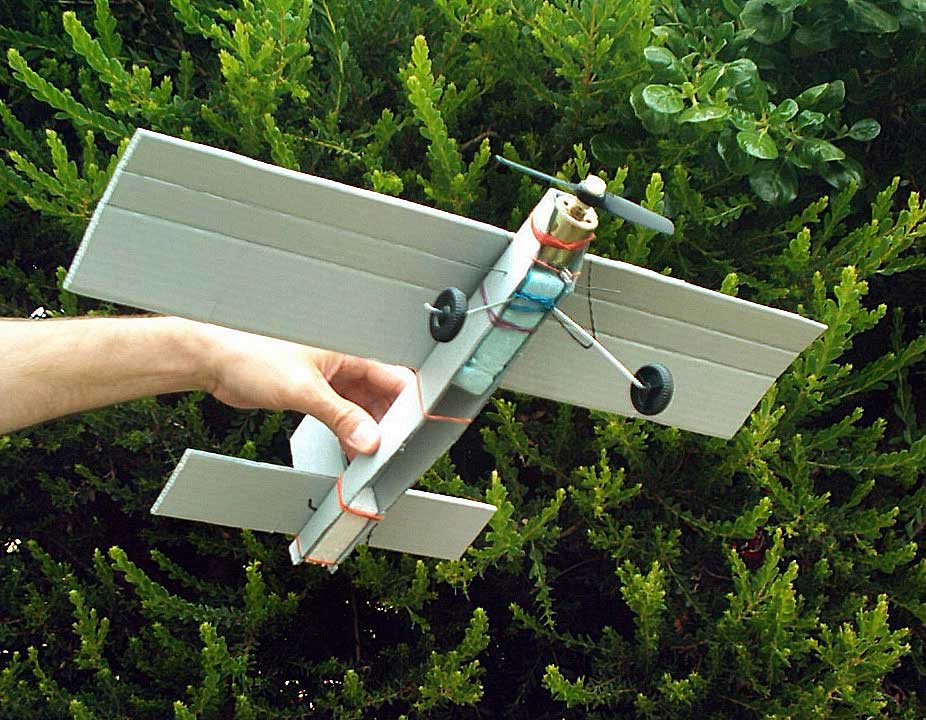 Peter McCarthy's low cost, cardboard RTP aircraft click to enlarge

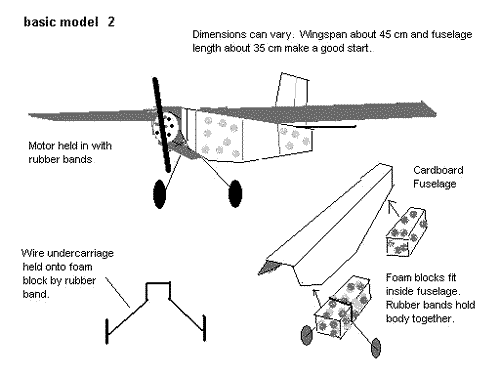
MAKING YOUR MODEL PLANE ©2003 Peter Mc Carthy This model plane is made from a cardboard box - a Reflex Copy Paper box is ideal but other similar boxes will do. It uses an electric motor and flies around a pole with a special rotating head that is set up in the middle of a hall or large, empty classroom. The model uses low-voltage electric current from a battery or transformer and it can be controlled by the "pilot" to take-off, climb, dive and land. With additional gear, two planes can fly at once so that races or "dogfights" can be held. To make the planes, the group should divide into sub-groups of 4 or 5 participants. Each sub-group makes a model and each person in the group should have a different job if possible. (Teachers will know this approach as the Cooperative Learning 'Jigsaw' technique.) Cardboard is made up of long tubes called "flutes". Make sure the flutes run in the direction shown on the sketches. Use a 'Stanley Knife' (VERY carefully!) or sharp scissors for cutting. The measurements given do not have to be perfectly exact. Group 1 : THE WING MAKERS You need a nice, flat piece of cardboard about 10 to 12 cm wide and as long as you can cut from the box.
 Note direction of flutes
Cut a piece of cardboard about 34 cm long and 10 cm wide. Draw a line down the centre of the cardboard, then draw parallel lines about 1cm away from this centre-line on each side of it. Use the corner of a ruler to score these last two lines so the sides can bend over easily. Trim the sides as in the sketch to make the the fuselage look a bit more realistic. 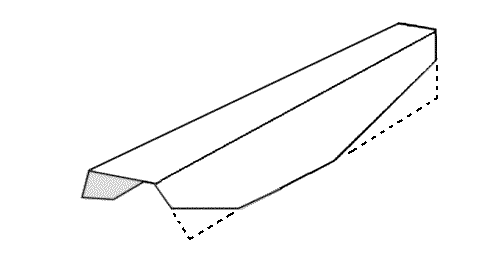
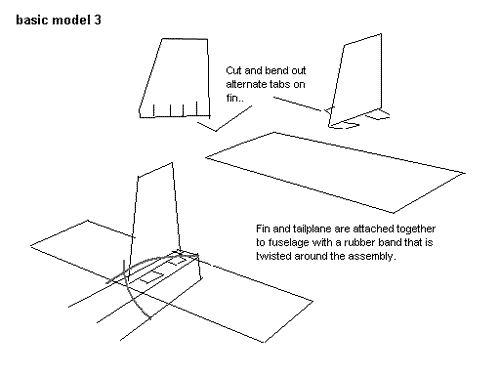
Cut one piece of cardboard 18cm long and 6cm wide for the tailplane. Cut another piece 9cm by 6cm for the fin/rudder. Make cuts of about 1.5cm at the bottom of this latter piece as shown. Bend out alternate tabs and attach the fin/rudder onto the tailplane with hot-melt glue as in the sketch. Sticky tape can be used instead of the glue if you haven't got any, and the rubber band that holds the tail assembly to the fuselage will also hold things in place. 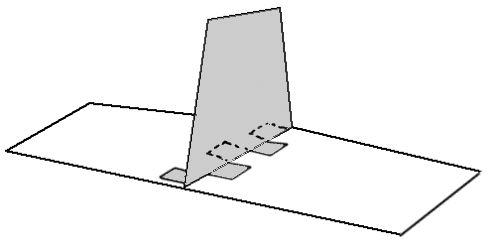
Using a pair of fine nosed pliers. bend the wire to the shape shown and hold on the wheels by bending up short ends of the wire. Slot the wire and wheels onto the foam plastic block and wind a rubber band around to hold the wire in place. (NB These previous steps might be already done for you). Take the fuselage and fit the undercarriage into it as shown. Hold it in place with rubber bands. Place the motor in position and hold it into the fuselage with more rubber bands.
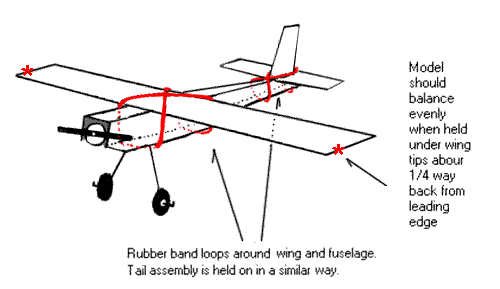
Collect all the bits and pieces. Fit the wing to the fuselage with a rubber band as shown. (Hold the wing in place, loop a band over the tail and then loop the other end of the band over the wing, motor and propeller and under the fuselage to hold the wing on).
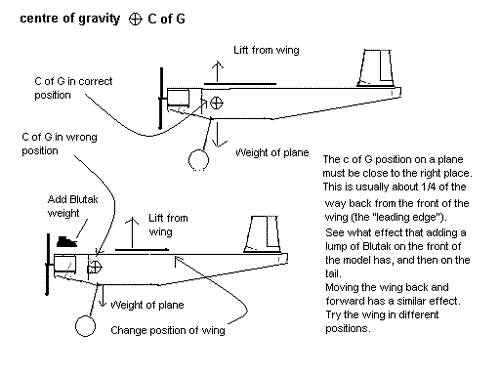
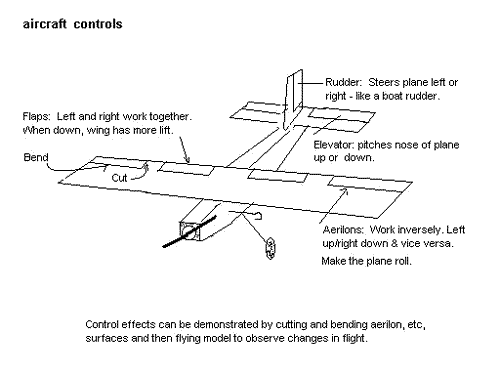
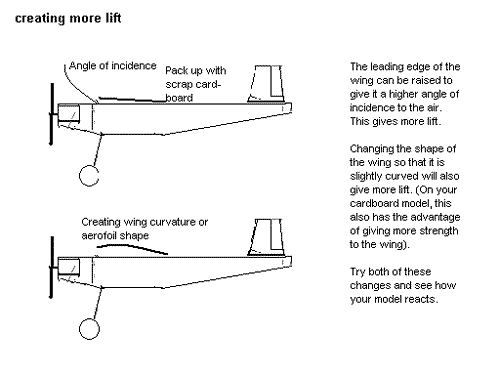
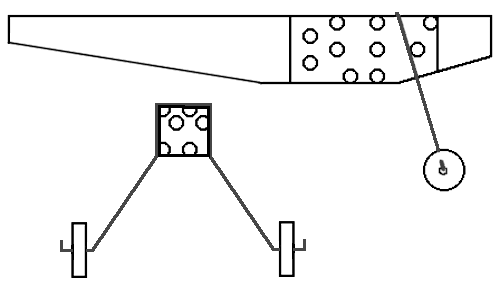
Slide the wing along the fuselage until the model balances at about a point just back from the leading edge (front) of the wing. Make a hole through the fuselage (and the foam block) with a long nail. Then straighten out a paper clip and push one end right through hole. Bend the end of the clip on the left side into a "U" shape over and push it back into the cardboard to hold it fast. Make a hook shape with the other end. Make the cuts in the wing and tail for control surfaces:elevators, rudder, ailerons, flaps. These are adjusted later in flying experiments. Check that the model now kind of looks like an aeroplane!
 Peter McCarthy's low cost, cardboard RTP aircraft click to enlarge
THE MODEL IS NOW READY TO TEST FLY.
also see...
RTP Electrix
|
© Copyright 1999-2005 CTIE - All Rights Reserved - Caution |