
The Building of a Modern Denny-Righter RadioplaneStory and Photographs by Luca Mariotti
In 1984, Luca Mariotti built his first UAV by modifying an old model airplane to make some tests on recovery systems. In 1995, Mariotti became interested in vintage UAVs (then called drones) and in particular, the work of Reginald Denny and Walter H. Righter. Such was the facination with Denny's work that, in his albeit rare spare time, Mariotti is collecting data to build a flying replica of a Denny-Righter Radioplane OQ-2A.
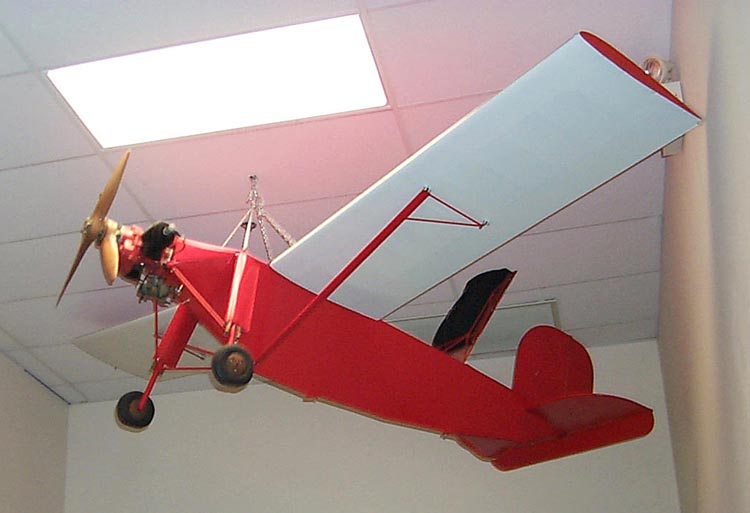 A beautifully restored OQ-2A Photo : National Model Aviation Museum - Click Image to Enlarge
The OQ-2A was successful enough to generate contracts for almost 1,000 targets in 1943. The OQ-2A was catapult-launched and was recovered under a 24-foot diameter parachute. Conventional landing gear cushioned the landing impact. After launch, gunnery target missions were flown by a ground controller using a "beep" box, so called because of the tones transmitted to the target's control system."
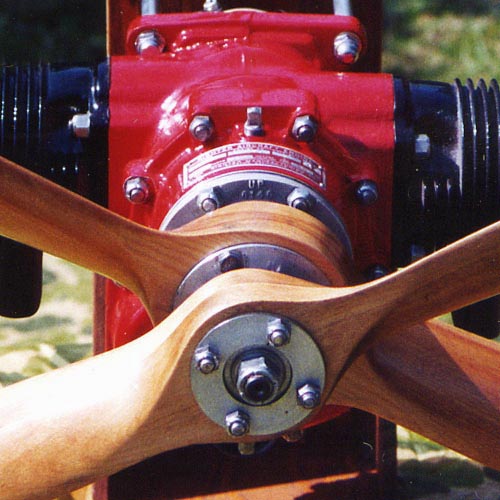
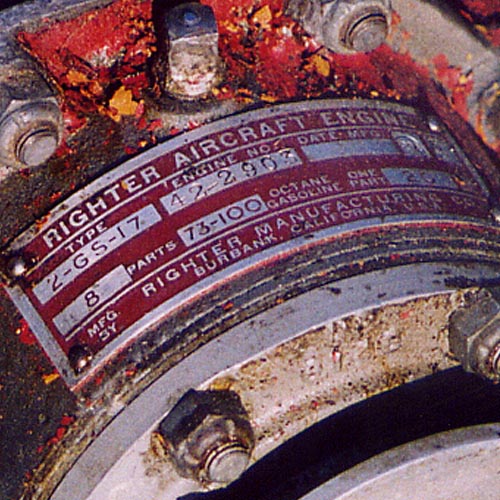
The EngineLuca Mariotti's first step was to a locate some original Righter engines with his collection now featuring an O-15-1 (OQ-2 engine), an O-15-3 (OQ-3) and an O-45-1 (OQ-14). Star of the show is the O-15-1, (the military designation for the 2-GS-17) now beautifully restored to 'fresh from the factory' condition - truly an example of dedication and craftmanship
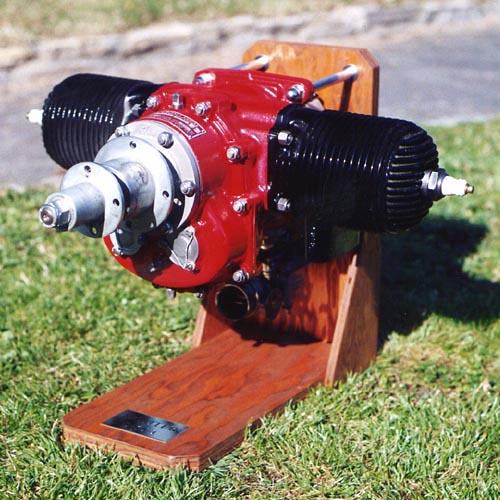 Righter O-15-1 Photo : Luca Mariotti - Click Image to Enlarge
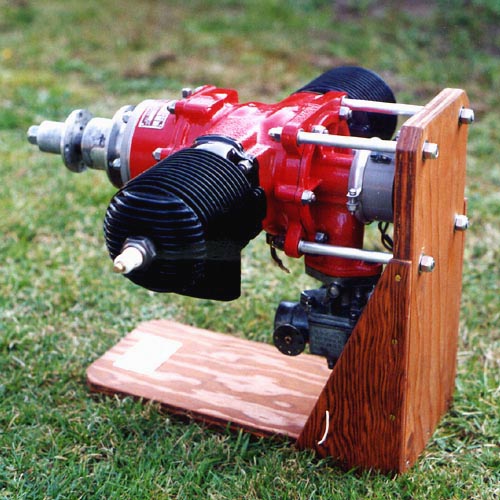 Righter O-15-1 Photo : Luca Mariotti - Click Image to Enlarge
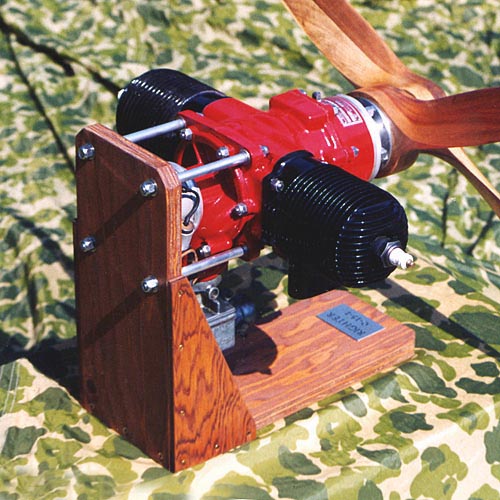 Righter O-15-1 Photo : Luca Mariotti - Click Image to Enlarge
 Righter O-15-1 Photo : Luca Mariotti - Click Image to Enlarge
Currently Mariotti is "translating" a microfilm copy of the original OQ-2A building plans into CAD format suitable to make the parts for the replica.
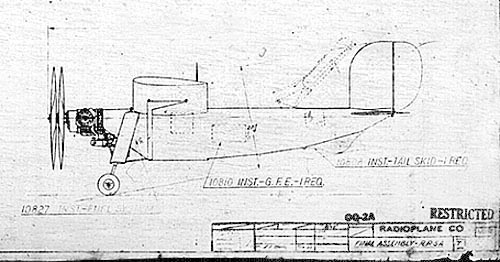
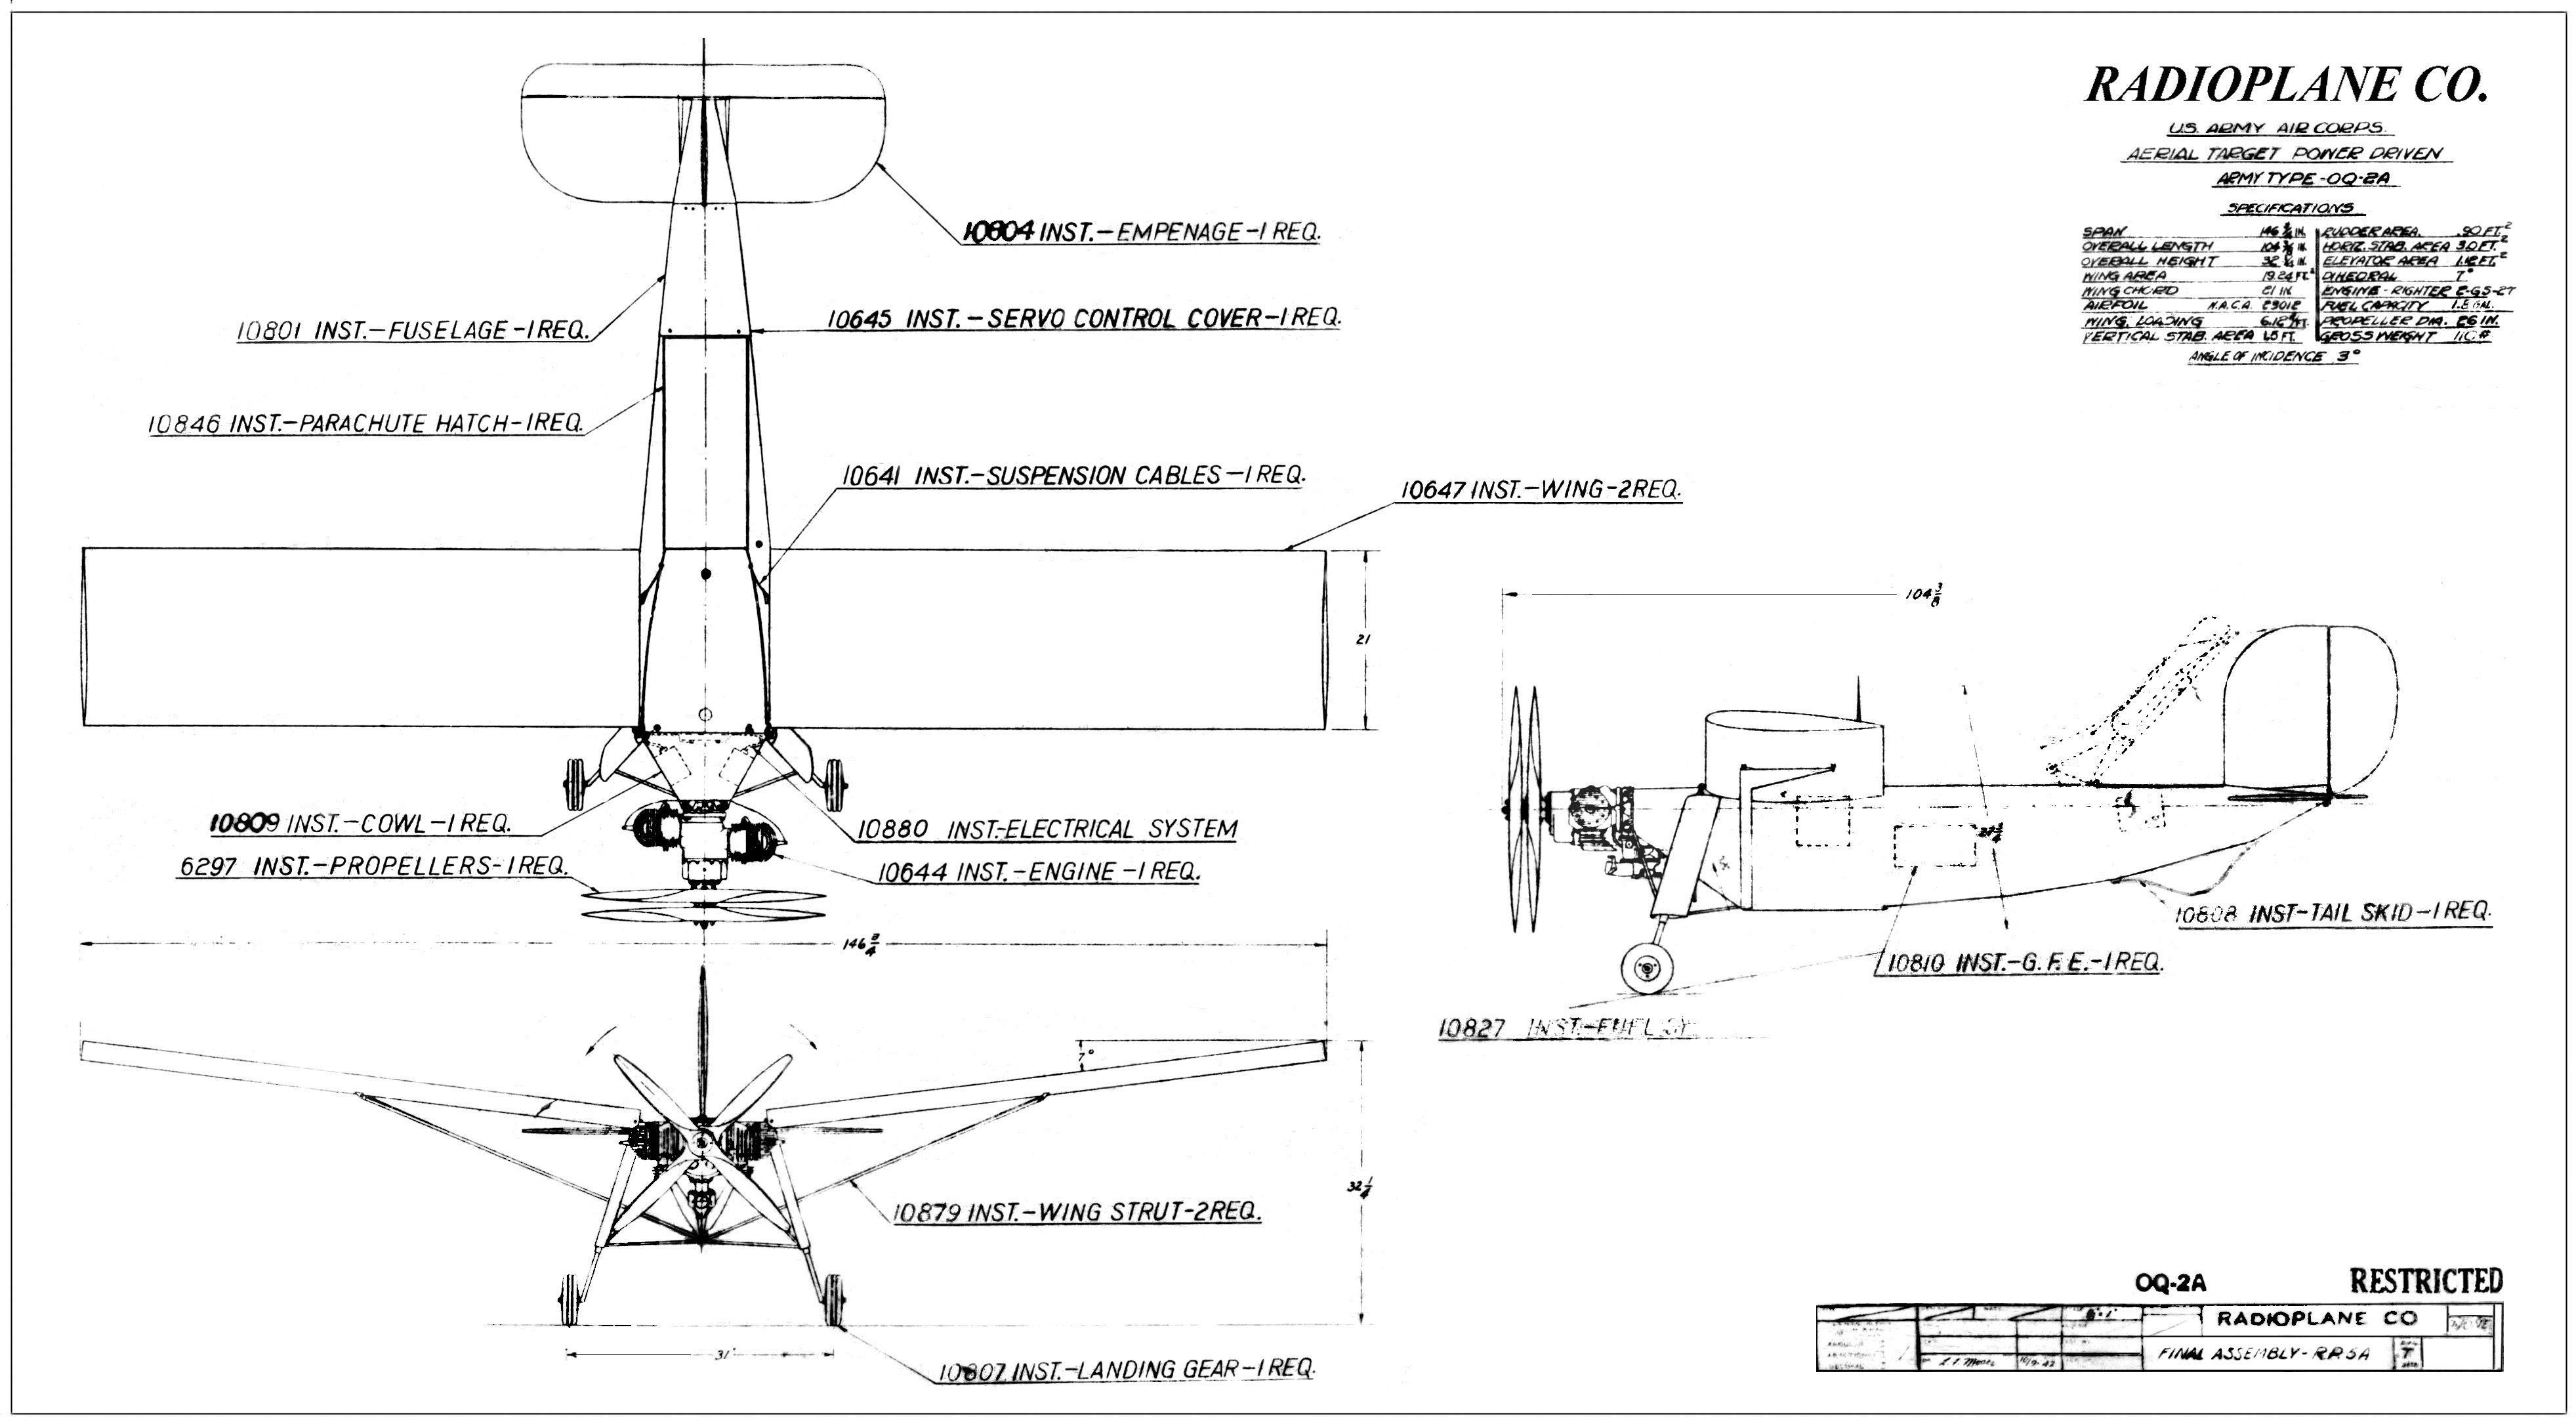
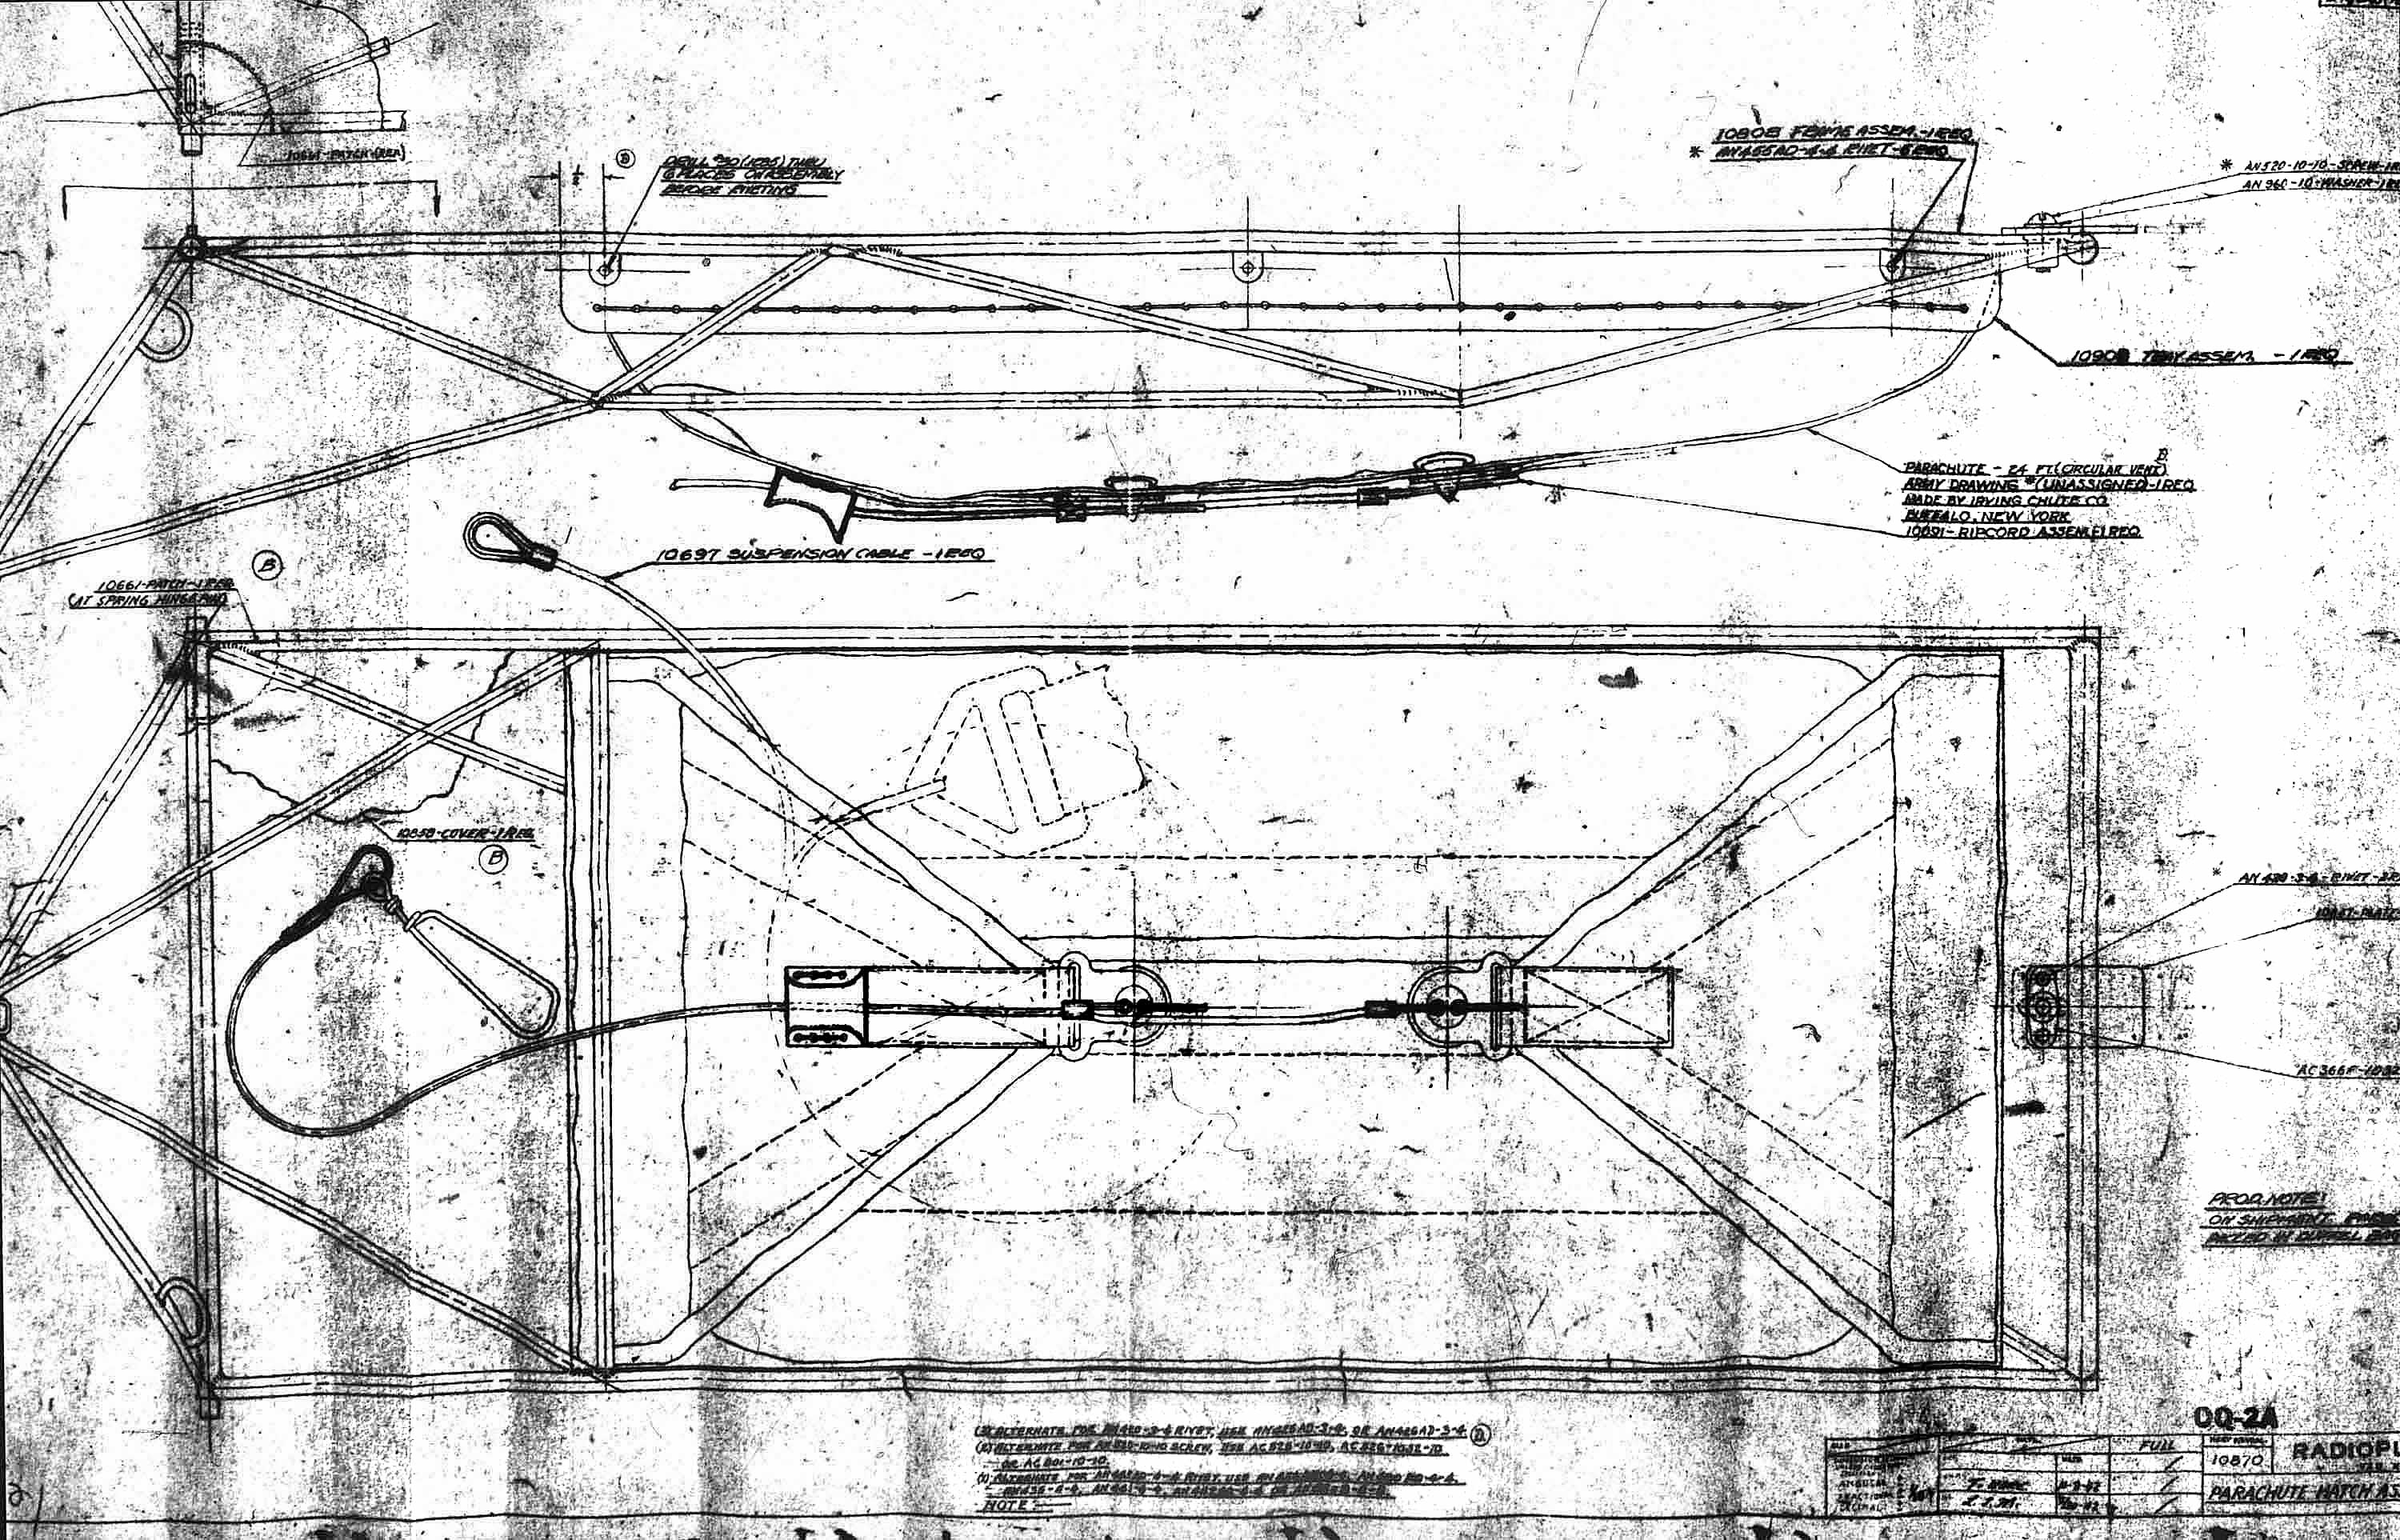
OQ-2 Microfilm Plans Oct. 9, 1942
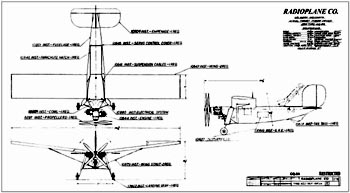
OQ-2 Microfilm Plans Oct. 9, 1942, 3View Download a master [700Kb] image Download a parachute detail [730Kb] image Download a wing section / airfoil [850Kb] image
"The building of a replica OQ-2 will not be an easy task and an interim project could be the reconstruction of an RP-1, which was a scaled up Dennyplane."
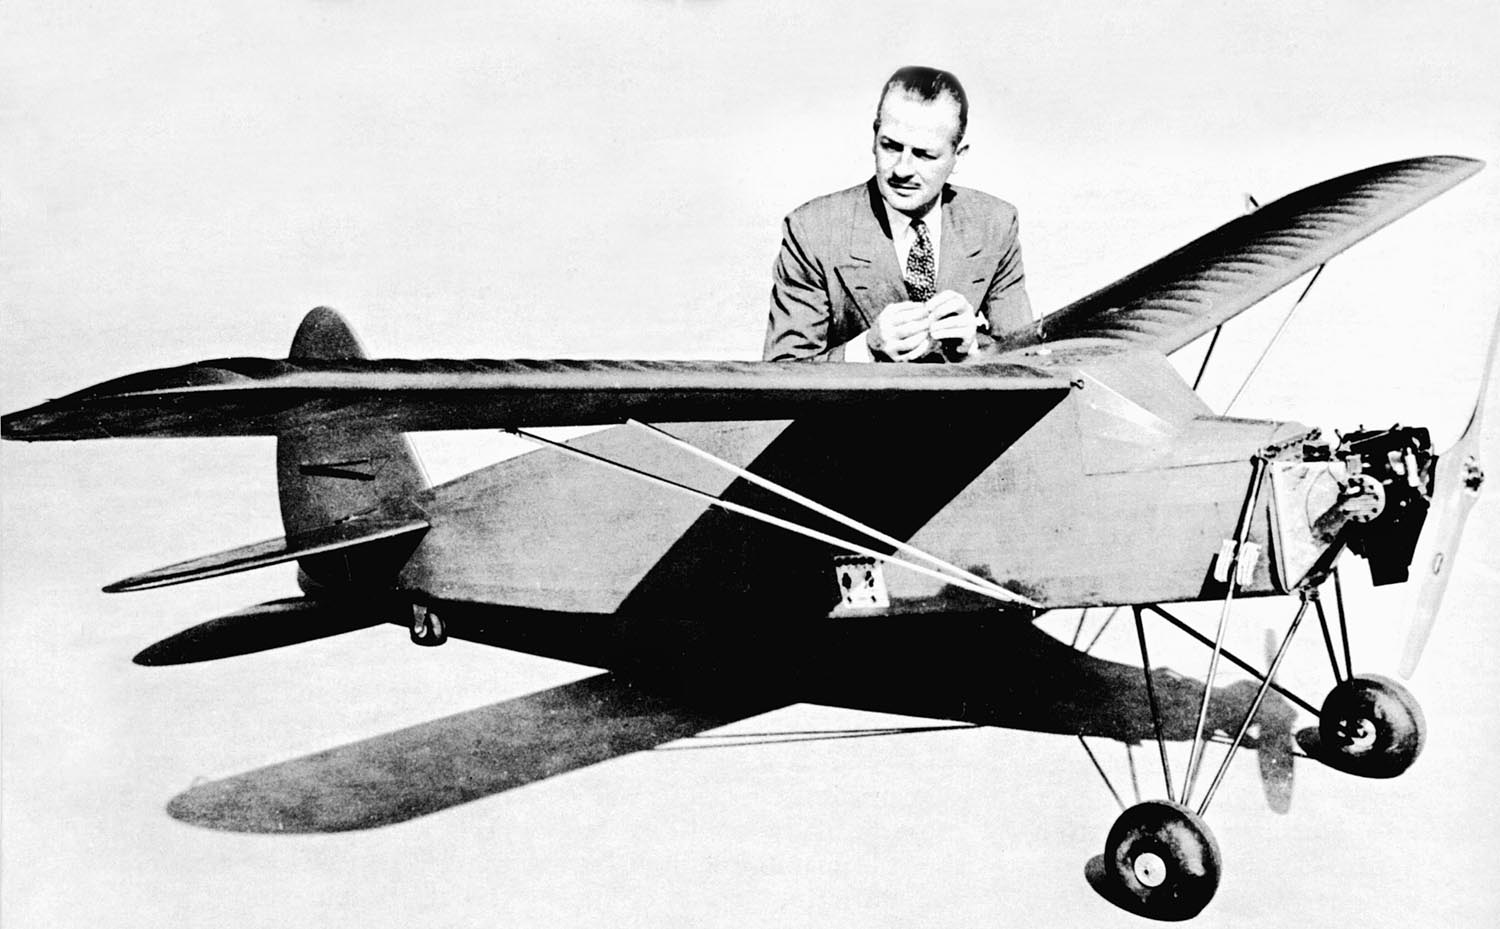
 Reginald Denny and his RP-1 'Radioplane', 1935 Photo : Righter Family Archives - Click Image to Enlarge Download a 1500 pixel [260Kb] or 2500 pixel [500Kb] image
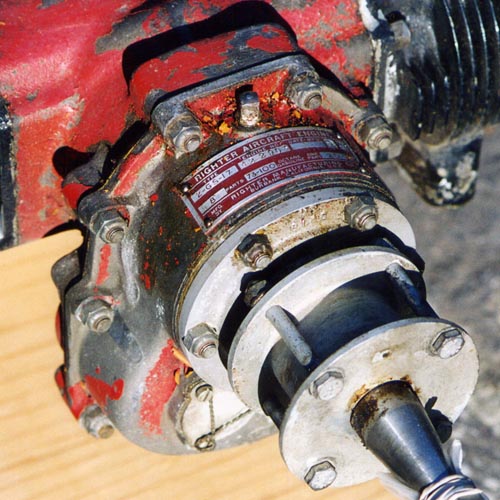
Restoring the EngineTwo years ago I answered an advertisement posted on Barnstormers, (a website devoted to aircraft restoration). It was for a vintage 'Righter' aircraft engine. The owners had had it in their basement since the 1950s when it was purchased by their father in a war surplus auction.I bought engine but, when the long awaited box arrived, I was somewhat disappointed, it was in far worse condition than I expected - nevertheless it was complete and after a month spent reading up on the engine from the small amount of information available, I began the disassembly.
 Righter O-15-1 Photo : Luca Mariotti - Click Image to Enlarge
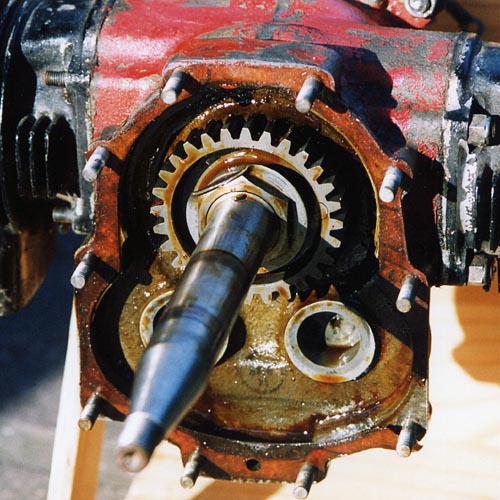
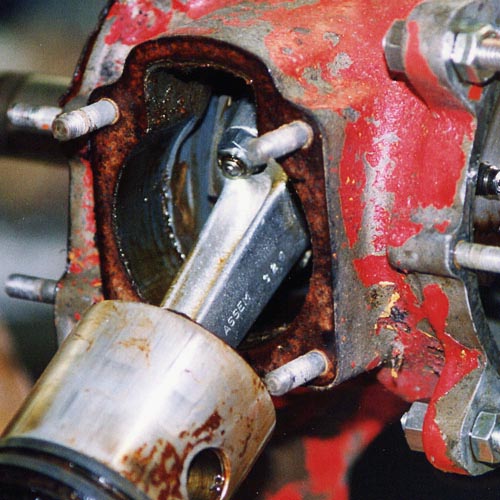
The only thing to do was to open the plug in the crankcase and fill everything with gasoline. After a week, I was able to get some movement in the crankshaft and after another week of daily attempts, (the fear of damaging something was ever present), I succeeded in turning the propellers a half turn. The next step was to remove the front cover.
 Righter O-15-1 Photo : Luca Mariotti - Click Image to Enlarge
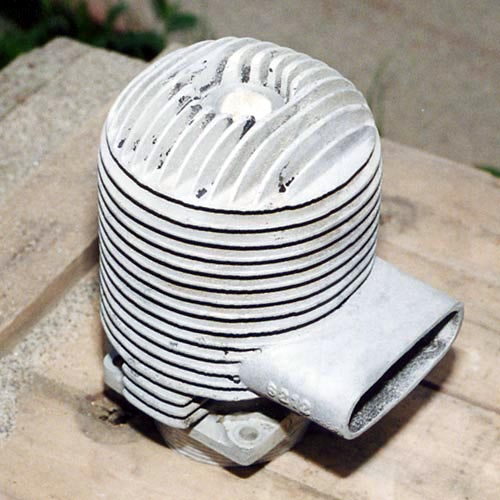
The timer showed almost no signs of rust and also came apart very easily. The rear crankcase cover was stuck firmly to the rest of the engine but came awy with the help of a rubber mallet. The cylinders however, tried, (and almost succeeded), to convince me that restoration is for masochists only.
 Righter O-15-1 Photo : Luca Mariotti - Click Image to Enlarge
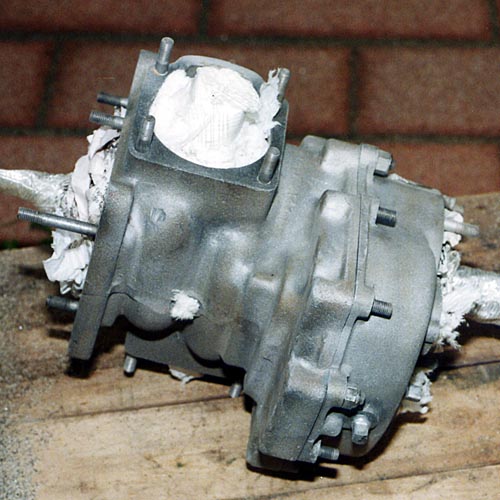
Now all the pieces were ready for a major cleaning and sand blasting. The operation of sandblasting was easy and effortless, followed immediately by the painting of the crankcase parts and cylinders. The painting was performed in the open at the first light of day (5.00 am) to avoid insects and the wind.
 Righter O-15-1 Photo : Luca Mariotti - Click Image to Enlarge
The operation was almost straightforward and at the end, I found myself with a Righter O-15-1 that to all appearances, looked as if it had come straight from the factory assembly line. A small wood support was quickly assembled and the engine bolted to it, but, something was missing: the propellers.
 Righter O-15-1 Photo : Luca Mariotti - Click Image to Enlarge
After a lot of sanding the propellers were painted in accordance with the aircraft's original 1940 technical manual. The engine is now complete and on show in my studio. I am very happy and proud to have made such an effort as an almost forgotten piece of aeronautic history lives again. Without these target drones and the ingenuity of how they were conceived and built, today's UAV would be only a dream.
 Righter O-15-1 Photo : Luca Mariotti - Click Image to Enlarge
|
© Copyright 1999-2005 CTIE - All Rights Reserved - Caution |